How to Repair GRE Pipe Correctly? Methods, Techniques, and Best Practices
GRE pipes are such resistant and strong pipes in harsh environments or under heavy loads. What makes them remarkable is their design and material, though they may require maintenance or repair if misused. The right repair method can reduce the risk of redo operations over time.
This article represents all methods of repairing the GRP pipes and available ways to prevent probable failures. Check out each section carefully!
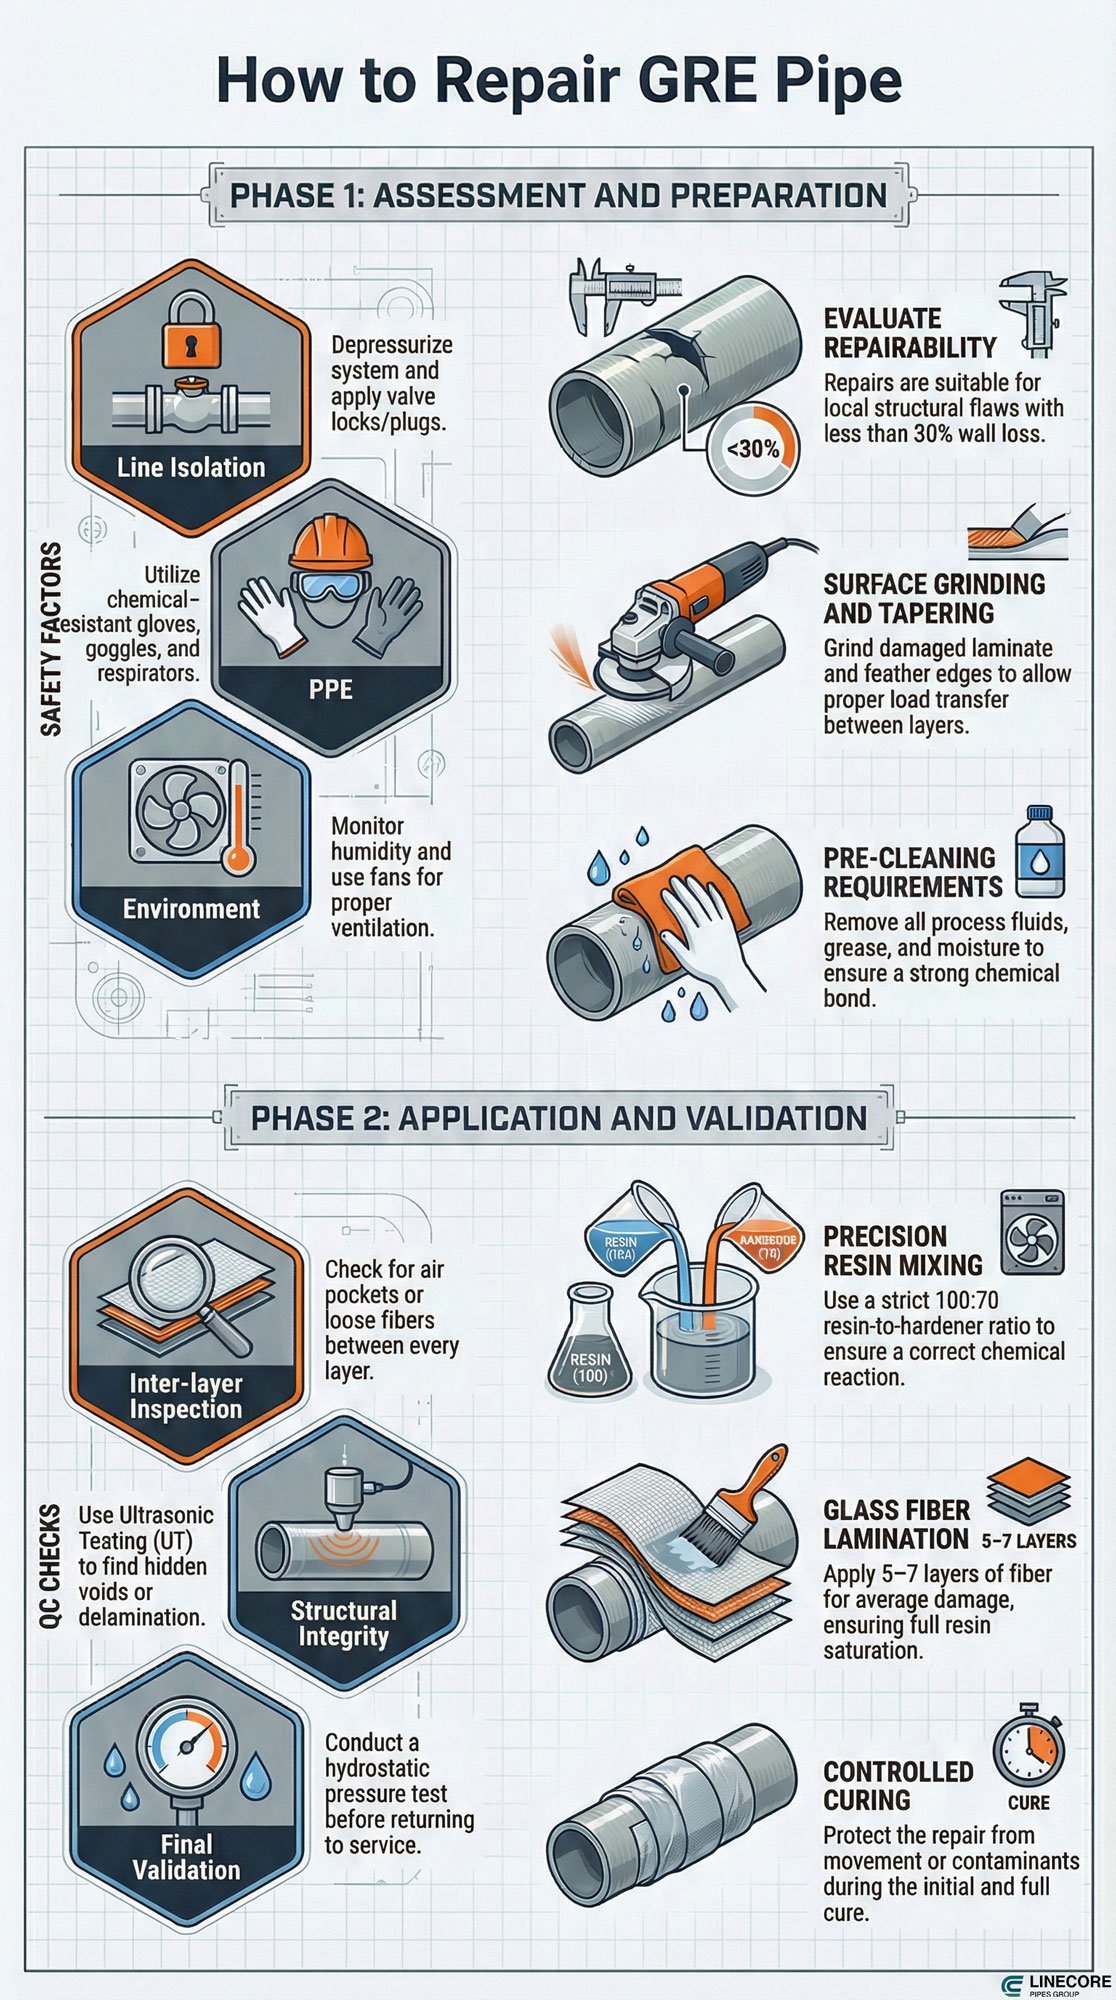
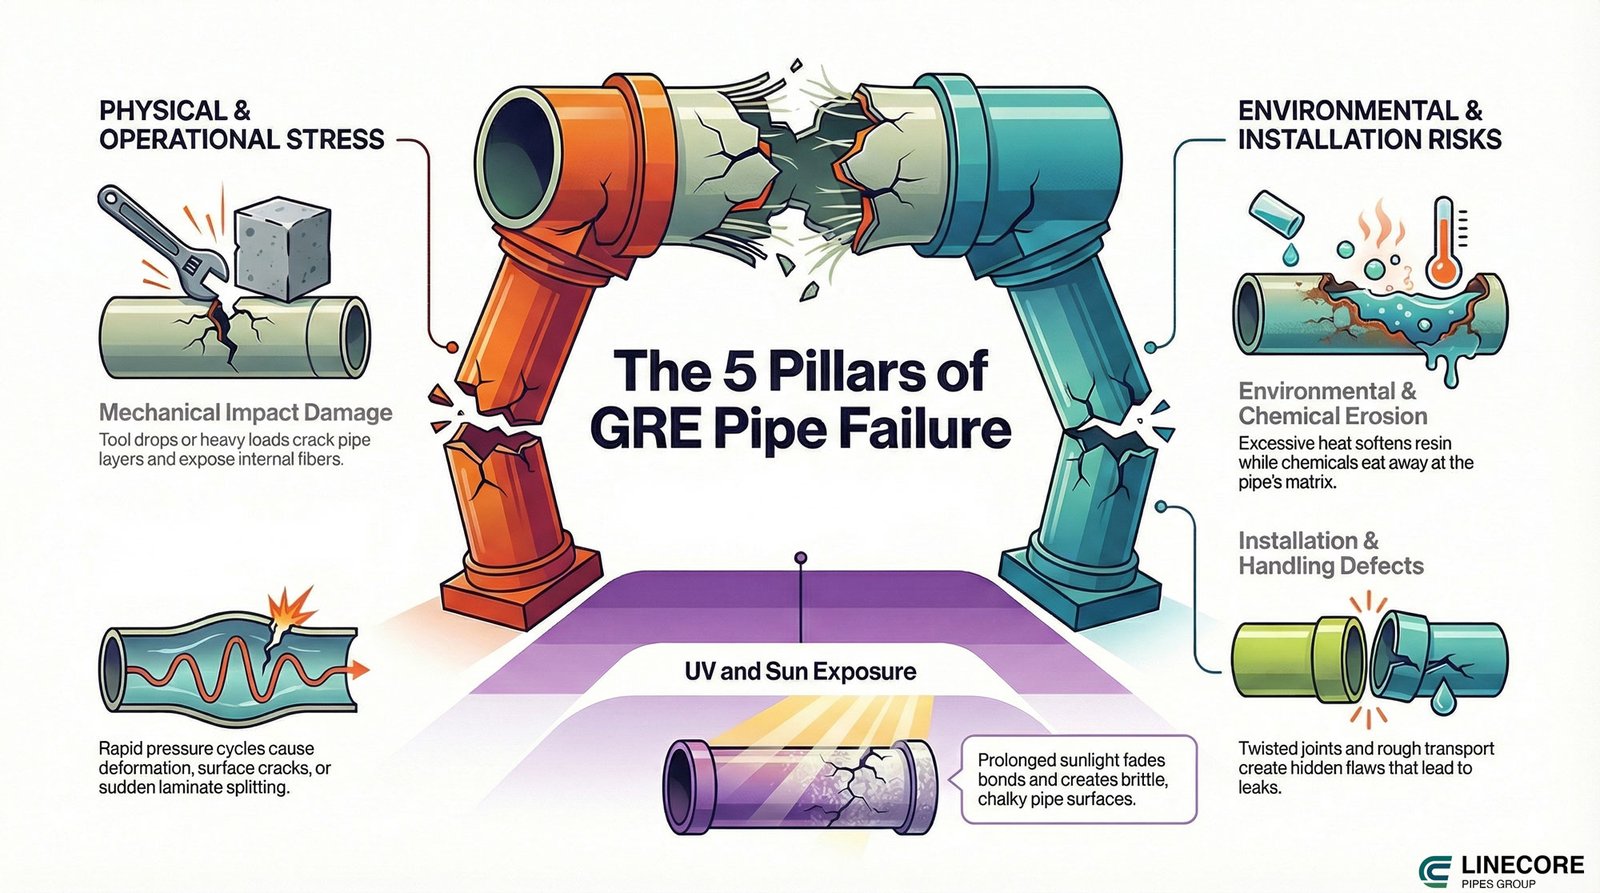
How to repair GRE pipe infographic (source: pipelinecoregroup.com)
The Construction of GRE Pipes: Why Repair Is Working?
Before getting into the main methods and techniques, let’s find out how GRE pipes can be repaired and why!
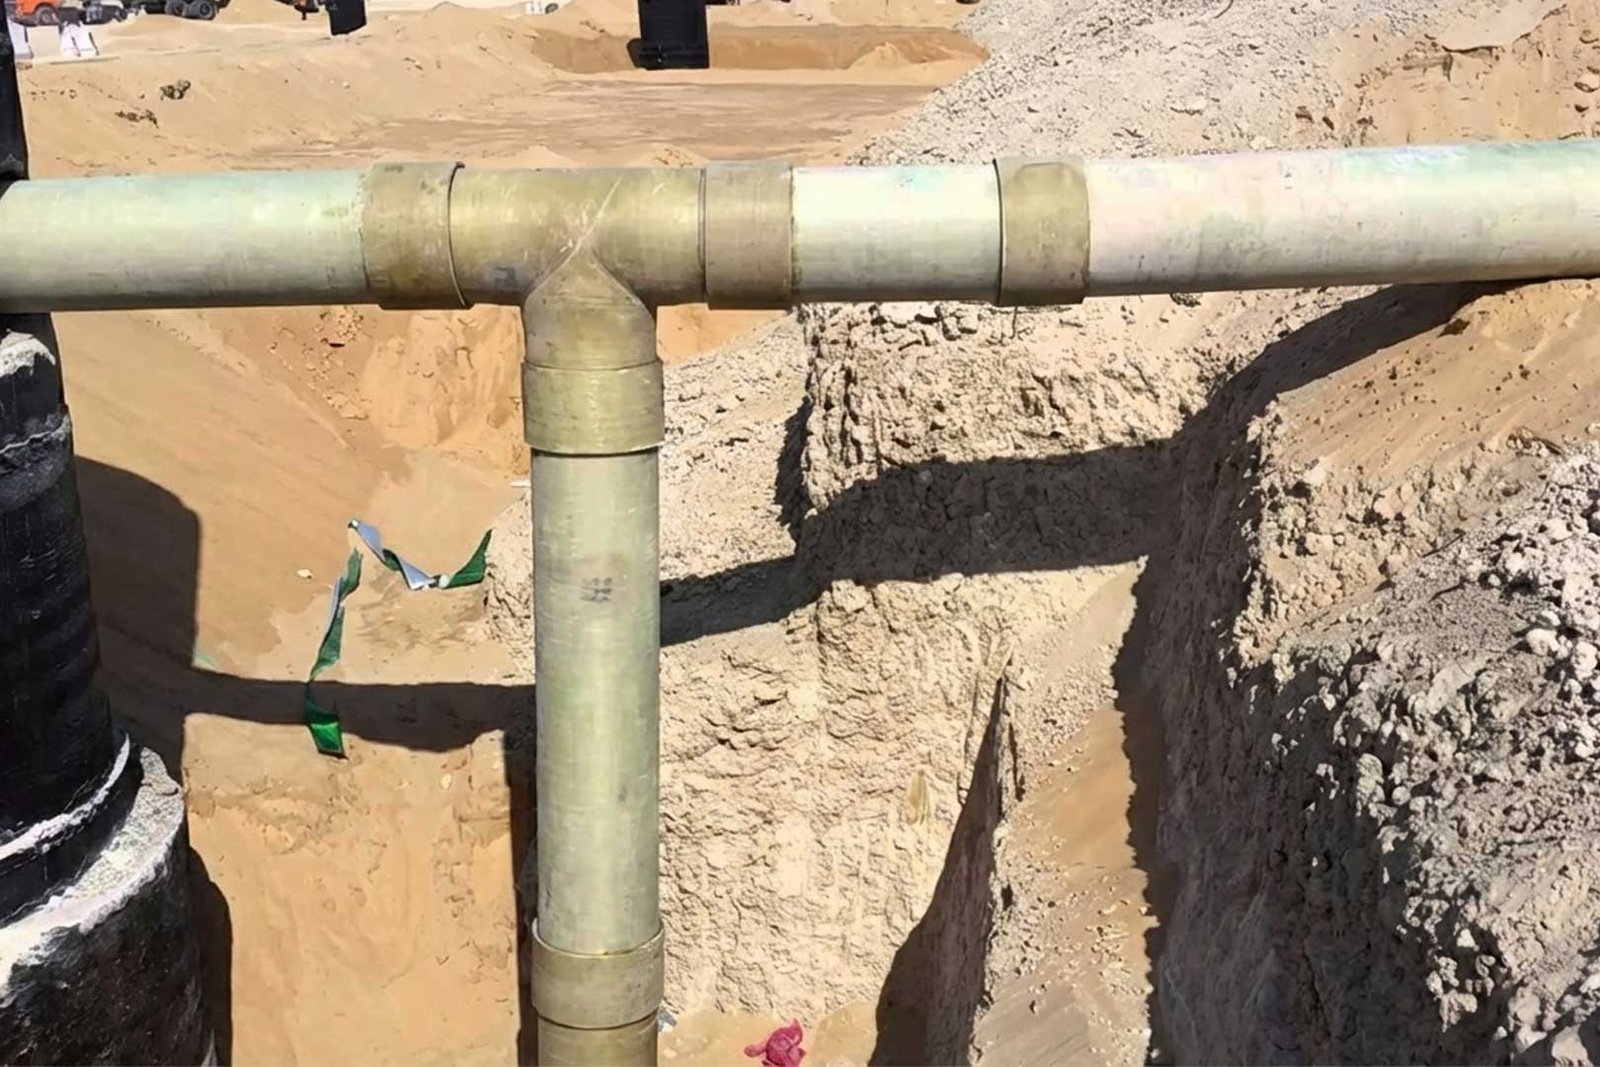
GRE Pipe Laminate Structure
Epoxy resin binds glass fibers for a strong base that fights chemicals. E-glass takes tension; S-glass fits heat needs.
Structural layers wind fibers to bear pressure. The inner corrosion barrier uses thick resin to seal fluids, 1-3 mm deep. This design targets fixes to outer harm.
Mechanical Behavior of GRE Pipes
Fibers carry pull; resin spreads shear across walls. Hoop winds hold high pressure if limits hold.
Impact splits layers with no flex. Vibration wears bonds slowly. Over 100°C, resin drops in strength by 20-50%. (Source: Scribd)
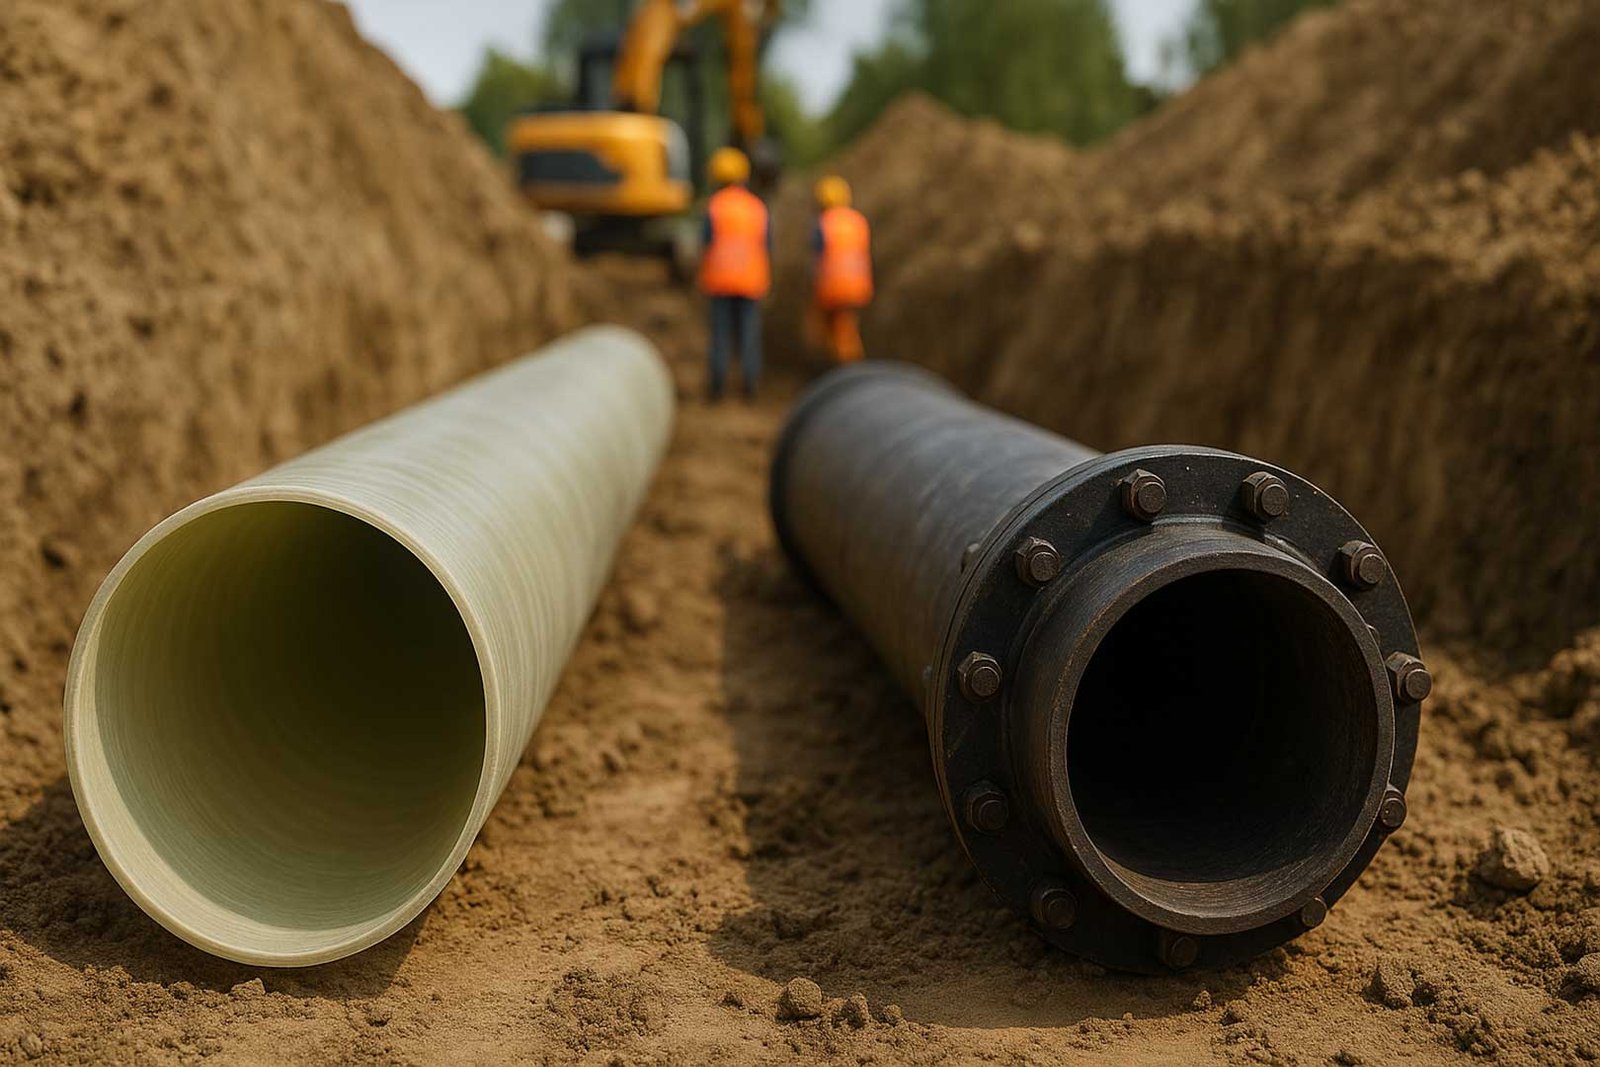
Steel bends first; welds join metal though. GRE snaps stiff; new layers bond cold to match loads, clean for grip. Steel quick; GRE precise to stop splits.
What Can Make GRE Pipes Fail? 5 Main Reasons
Early inspections can prevent huge failures that cost almost a replacement in the pipe’s lifespan.
- Mechanical Damage: Hits from tools or drops crack layers and expose fibers. Extra weight, like piled gear dents or breaks the pipe wall.
- Operational Damage: The ups and downs of pressure can cause deformation or cracks over time. Sudden high pressure bursts sections or splits laminates. (Source: ScienceDirect)
- Environmental & Chemical Damage: Too much heat softens resin and cuts strength. Wrong chemicals eat at the matrix. Age and sun fade bonds, leading to chalky surfaces.
- Installation and Handling Defects: Bad supports, twist joints, and stress walls. Rough moves during the ship or lift create hidden flaws that leak later.
Inspection and Damage Assessment
Smart checks catch flaws early to guide fixes or swaps. This section explores the most-used methods, including where exactly to find evidence of failure or leakages.
Initial Visual Inspection
Start with a close look for wet spots or stains from leaks. Shine a flashlight in dark spots to spot drips or trails. Hunt for cracks along fibers, slow-oozing pinholes, or delamination that bubbles like peeling paint. Watch for color changes or soft areas that signal bigger problems. Use dye if tiny flaws need highlighting.
Non-Destructive Testing (NDT) for GRE Pipes
VT uses visual inspection or scopes to see defects. Tap tests hear hollow spots for voids. While, UT sends waves to the pipes’ walls to find thin walls or gaps. Composites scatter signals, so methods like UT need special tweaks and miss some bonds.
How to Classify the Damage Range
Non-structural hits like scratches need to be watched only. Local structural flaws, under 30% wall loss, suit repairs. Extensive damage to over half of the wall or full breaks calls for a full pipe change.
The next section shows how to plan for the repair efficiently.
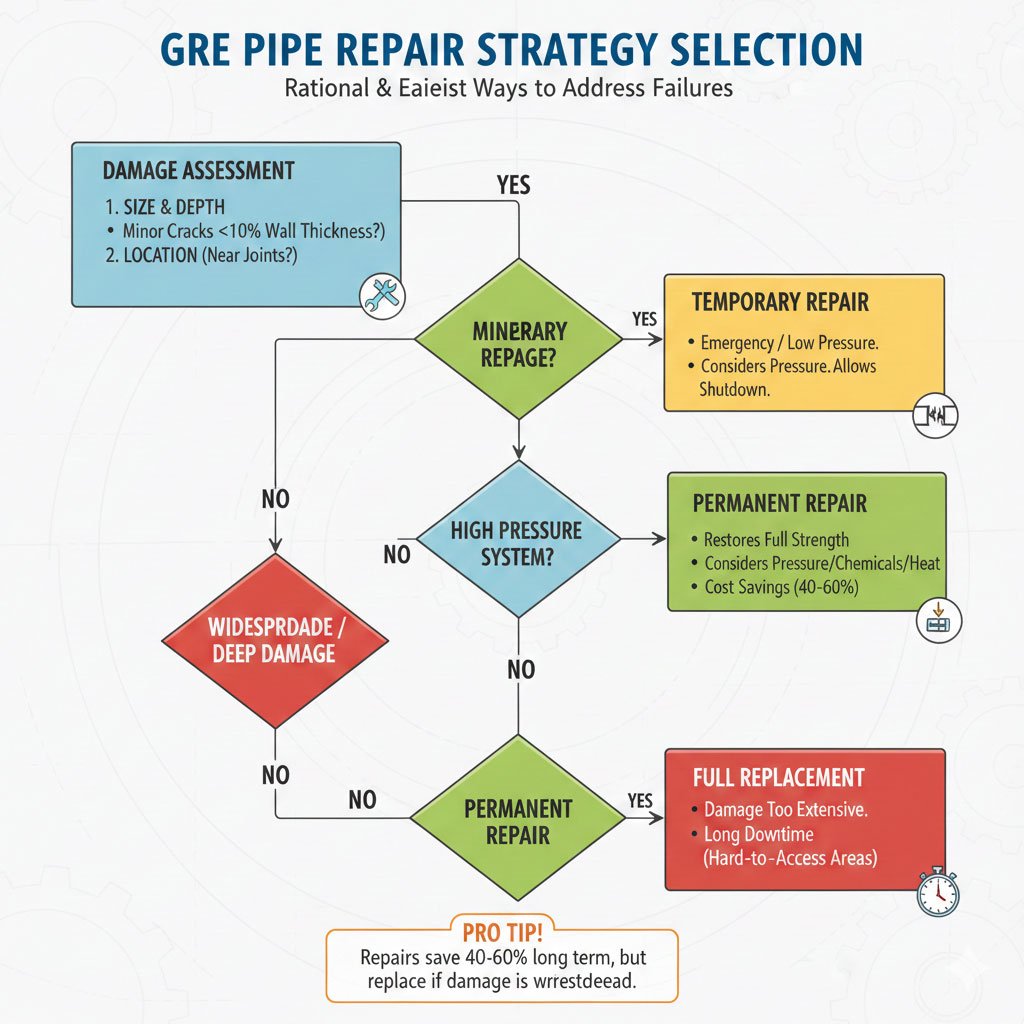
Repair Strategy Selection
Figuring out the best way to fix a GRE pipe means weighing the damage against what the system can handle, so you don’t end up with worse problems down the line. Let’s check what the rational and easiest way is to get rid of failures.
Repairability Criteria
Look at how big and deep the damage is. Minor cracks, less than 10% of the wall thickness, are usually fixable, but deeper ones could compromise the whole thing. Where it’s located counts too; spots near joints deserve more care.
- Technical Point: Consider the pipe’s pressure limits and what it’s carrying, like harsh chemicals or high heat, to check the repair holds up safely.
Temporary vs Permanent Repair
A quick, temporary patch makes sense in an emergency or when the pressure is low. It gives you time to properly shut down. But in high-pressure systems, leaks could come back, spots may show up again, or even devastating failures happen because the adhesive isn’t strong enough.
Decision to Fix or Replace
Check to see if the repair can make the pipe strong again without any weak spots. In hard-to-access or crowded areas, the shorter downtime means easier fixes instead of long replacements.
- Pro Tip: When you add up the expenditures, repairs can save you 40% to 60% in the long run, but if the damage is too widespread, you should replace it.
Safety Considerations in GRE Pipe Repair
In the GRE pipe repair process, there are multiple factors to include and prepare that make workers and the pipeline aware of probable risks and dangerous actions.
| Safety Aspect | Description | Precautions | Tools/Gear |
|---|---|---|---|
| Line Isolation and Depressurization | Isolate and depressurize the pipeline. | Check valves and venting systems. | – Valve locks – Isolation plugs |
| Chemical and Thermal Hazards | Protect from chemical and temperature risks. | Identify hazards and use shields. | – Chemical-resistant gloves – Heat shields |
| Personal Protective Equipment (PPE) | Wear PPE for protection. | Ensure proper fit and use. | – Gloves – Goggles – Suits – Respirators |
| Environmental Limits | Control temperature, humidity, and ventilation. | Monitor conditions. | – Humidity sensors – Fans – Air circulators |
- Safety First: Considering the points below helps engineers and project managers to avoid mistakes and bad happenings!
Preparation of the Surface: What Avoids You from Failure
To fix a GRE pipe correctly, the surface needs to be prepared properly. A clean, well-prepared surface makes sure that repair materials stick better and last longer.
- Pre-Cleaning: Get rid of all process fluids, grease, and moisture from the pipe surface before you start fixing it. This stops dirt and other things from getting in the way of the epoxy connection.
- Surface Preparation: To get the surface ready, grinding should be done with the right depth and taper. You need to take out the damaged laminate and feather the edges so that the repair materials can transfer the load properly.
- Acceptance Inspection: Make sure the surface is clean, dry, and free of any dirt or other pollutants, and check that it is rough enough to satisfy the criteria. This makes sure that the conditions are right for a successful repair.
Repair Material Preparation and Mixing
This is where all we prepared for the surface is ready, and it’s time to make the material and repair’s mixture.
Epoxy Resin and Hardener Selection
Select an epoxy resin and hardener compatible with the GRE pipe system to ensure strong adhesion and durability under pressure.
Mixing Ratios and Control
Follow precise resin-to-hardener ratios (e.g., 100:70) to make sure the correct chemical reaction. Achieving the right color and homogeneity is key to the effectiveness of the repair. (Source: ResearchGate)
Pot Life and Temperature Effects
The pot life means the working time depends on the temperature balance. This factor shows how the repair, curing, and post-curing process must go on:
- Hot environments speed up curing.
- Use additives to slow curing.
- Complete repairs within working time.
GRE Pipe Repair Application Methods
The main process begins here. Once the pipe surface and materials are ready, it’s time to add the mixture to the damaged section and begin the layering process.
Filling and Base Repair Application
To make such a strong and non-leakage bond, the process starts with adding epoxy to the crack areas. It’s necessary to remove air pockets in this process to reach such complete coverage and maximum adhesion.
Glass Fiber Lamination Technique
For a durable repair, glass fibers must be correctly oriented and aligned for strength. Resin impregnation ensures that the fibers are fully saturated. This structure can provide enough thickness with reinforced power to the pipes.
How to Control the Wall Thickness During the Layering Process
- The number of layers applied depends on how serious the damage is. As noted in Scribd, for an average range of damage, 5–7 layers are used.
- Field practices may require specific fiber weights, with each layer carefully applied for a high rate of reinforcement.
- The overlap length and reinforcement zones are critical to ensuring strength and longevity.
- Proper layer thickness ensures the repair can withstand operational pressure and external stress.
- This application method is for the pipe’s integrity as a long-term, reliable solution.
Field Work and Repairs in Time-Intensive Cases
When doing repairs that need to be done quickly, it’s very important to plan out the order in which you accomplish things, especially when you have to shut down for a short period. Good planning makes sure that each phase is done quickly, which cuts down on downtime. Check the points and the table below to achieve the main instruction:
For a seamless repair procedure, everyone on the crew has to know their duty and work together. When the crew is working on complicated or urgent repairs, clear communication and assigning tasks help them get things done quickly.
It might be hard to make repairs in tight or operational spaces. Because there isn’t much room and construction is always going on, unique tools and procedures are needed to keep people safe and make sure things operate well around existing infrastructure.
| Field Constraint | Solution | Actions | Tools/Techniques |
|---|---|---|---|
| Environmental Factors | Use portable equipment and adjust work methods. | Monitor weather, adjust schedules. | Portable heaters, weatherproof gear |
| Access Issues | Optimize methods for confined spaces. | Plan for minimal space use. | Compact tools, access equipment |
| Time Pressures | Work in phases to reduce downtime. | Prioritize tasks and resources. | Task management software, phased repairs |
Curing, Managing the Environment, and Safeguarding
Curing and regulating the environment are two important steps in making sure the repair lasts.
- The First Cure Phase: Let the epoxy cure all the way before moving on to the next steps to produce a strong connection.
- Requirements for Full Cure: You may speed up the curing process or let it happen at room temperature. The temperature has an effect on the final strength. The repair may be weaker if you heat it up more, but it will go faster.
- Protection While Healing: As it heals, make sure the repair doesn’t move, become filthy, or change shape. This makes the epoxy strong and maintains the GRE pipe in place in a way that will last.
How Does the Quality Control Process Work?
The case of quality control is necessary for the repair of GRE pipes to keep them in the way of internationally verified pipes during their lifespan and after changes like repair or treatments. Check the table below that shows essential factors in the QC unit of this process:
| Quality Control Aspect | Description | Actions | Tools/Techniques | Common Issues |
|---|---|---|---|---|
| Visual Inspection Between Layers | Check for gaps or inconsistencies. | Inspect each layer for uniformity. | Magnifying glass, inspection lights | Uneven resin, air pockets |
| Fiber Alignment and Consolidation | Ensure fibers are aligned and saturated. | Verify alignment and resin impregnation. | Alignment jigs, pressure rollers | Misaligned fibers, incomplete saturation |
| Common Workmanship Errors | Look for fiber placement issues or air pockets. | Correct errors immediately. | Visual checks, tap testing | Loose fibers, trapped air |
Post-Repair Inspection and Validation
Final checks are to ensure that the repair goes through the safety and performance standards before the pipe returns to operation.
1. Visual and Dimensional Inspection
Check if the surface is smooth enough, in the case of the laminate, in a consistent and uniform manner.
2. Non-Destructive Testing after Repair
Use methods of NDT like ultrasonic testing to check for available voids, incomplete bonding of epoxy, or delamination in the repaired area to avoid probable flaws.
3. Pressure and Leak Testing
Conduct hydrostatic testing to evaluate the pipe’s ability to handle pressure. Final inspection to check the test pressure to ensure it is within the required limits with no leaks before the pipe is put back into service.
Lessons Learned from Common GRE Pipe Repair Failures
- Why is it bad not to prepare the surface well?
If the surface isn’t cleaned and prepared properly, the bond won’t work, which means that repairs will be weak and break when they are put under stress. - What happens to repairs when the mixing ratios are wrong?
If the ratio of resin to hardener is wrong, the repair may not cure properly, which might weaken it and make it less durable. - What Happens When There Aren’t Enough Fiber Layers?
If you don’t put on enough fiber layers, your repair could not be strong enough and could break under stress or strain. - What makes rushed curing so dangerous?
When you rush the curing process, which is typically due to time constraints, the epoxy may not fully cure, which weakens the repair and shortens its life. - What happens to repairs if you don’t inspect or test them?
If you don’t do the essential inspections or testing, you can miss problems like voids or delamination, which might cause the repair to fail too soon.
LineCore: A Long-Lasting Solution for the GRE Pipe Repair
If you’re looking for a reliable, long-term solution beyond GRE pipe repair, LineCore Pipes Group offers high-quality GRE piping systems built for pressure integrity, corrosion resistance, and extended service life.
Reach out to LineCore Pipe Group’s technical team today to choose GRE pipes that reduce future repair needs and align with your specific operating conditions. (info@pipelinecoregroup.com)
FAQs
1- What makes GRE pipes fail?
Damage from machines, changes in pressure, and exposure to chemicals.
2- How long does a GRE pipe repair last?
Repairs can last for years if they are taken care of properly.
3- Is GRE pipe maintenance only for a short time?
No, it’s a permanent fix if you use the appropriate materials and procedures.
4- What is the best way to fix a GRE pipe?
People often employ epoxy resin and glass fiber lamination to make sure repairs last.
about
The Author

Farshid Tavakoli is a seasoned professional in engineering and international trade. Holding degrees in Electrical Engineering, Mechatronics, and a Doctorate in Business Administration (DBA) from the University of Lyon, he also has a strong background in industrial automation and production line technologies.
For over 17 years, he has led an international trading company, gaining deep expertise in commercial solutions tailored to industrial needs. With more than 8 years of active involvement in infrastructure development, he specializes in the supply of electromechanical equipment for water and wastewater treatment plants and transfer projects.
Together with comapny expert team, he now provides consultancy and integrated solutions for sourcing and implementing complex infrastructure projects across the region.